Tuesday, April 2, 2013

The Karen Kane Knockoff
The Karen Kane Shirt
The Knockoff

I purchased a beautiful silk print peasant style top for the Christmas holidays that I just love and get compliments every time I wear it. It's a very popular silhouette that works well for me. The top is by Karen Kane who makes beautiful upper moderately priced clothing in updated to modern looks. 

Since the style is so generic it lends itself to many variations, so I have decided to recreate it into a pattern that I can use over and over again. The style is a rather simple one with no intricate details so copying it should be easy to do. I will need to create just three pattern pieces - a front, back and sleeve. The tricky part will be adding the extra fullness needed at the neckline and sleeve hems to accommodateg some gathering.   

My approach will be to do a rub-off of the shirt. I've read several articles about this approach but have never actually done it before. Seems simple enough. Fellow blogger Picknstitch recently posted a very helpful tutorial on the subject that I intend to follow.  

To do the rub off I laid some large fluffy towels over my worktable. I covered the towels with some drafting paper I purchased at IKEA. Its cheap, $4.00 a roll that comes in 24 inch widths, just right for making pattern alterations or creating patterns as I am doing now.

Garment layered over paper and towels
I then carefully placed the Karen Kane top, inside out,  atop the paper smoothing out any wrinkles. I pinned the top to the paper to preventing it from shifting while I worked. Then with the sharp tip of a pencil or straight pin I traced the seam lines by poking through the paper. Once all the poking is done, I remove the shirt and slid the paper off the towels. I then drew the seam lines with ruler and pen following the poked pin marks. I did this for the front, back and sleeve, thus creating the three pieces I need to make the copy cat shirt.

Poke the seam lines to create the shape of the pattern     
Marking the center front

The finished front pattern piece

All in all the process worked great. My only dilemma was adding the proper amount of fullness to the top to address the gathers. Since the Karen Kane top doesn't appear to have an inordinate amount of gathering I added 50% of the measure of the neckline for the gathering. I did the same for the gathers at the sleeve hem. Both seemed to do the trick.

I have other renditions of this top on the docket. The next one will have 3/4 length sleeves as I want it to be more of a spring to summer top. I also plan to use the blouse fabric as the bias trim around the neckline and will add a narrow placket to the front with small buttons making it just different enough to add variety to my wardrobe. I'll post that one when it's done. 


Tuesday, March 26, 2013

Never Enough White Shirts

Pretty in White

One can never have enough white shirts or blouses in my opinion. I tend to gravitate to them in the stores and like the fact they go with any color or variety of bottom. My problem is that I either wear them and launder them so much they begin to yellow, or - this is painful - I simply grow out of them. I have three very pretty white shirts that I love with interesting details that I can no longer wear because they no longer fit. 


So, while I continue my quest to perfect my fitting skills, a simple white shirt that I can wear to my hearts content seemed a practical choice for a sewing project. This time I chose a Palmer Pletsch pattern with a detailed guide to pattern fitting. Though a rather conservative style it is one I could easily modify.

Getting princess lines to fit properly has been an issue for me lately. My bust apex is lower than most of the patterns I have used and I've had difficulty adjusting them properly. I also seem to have a hollow area right above my bust that causes a bubble right above the bustline and at the armscye. So, for these reasons this pattern seemed a wise choice. 

After carefully reading through the pattern fitting directions, which call for elaborate taping at the seam lines, slashing and pivoting, etc., it still would only produce half a pattern to fit. Instead I chose to bypass all that and make a muslin. I transferred all the slashing markings onto it so I could use the pattern fit recommendations. The resulting shirt fits well given my figure issues and I was able to adjust the princess lines to fall where I wanted them. 


I like, but not love this pattern. Now that it fits, however I see lots of other possibilities.   A longer length and changing the sleeves from 2 pieces to one.

Monday, March 4, 2013

The Rhythm of Sewing


Believe it or not there is a rhythm to sewing. It's something experienced sewists don't ever think about or realize exists. But, as a sewing instructor to new sewers, I see when its not there and have come to appreciate its importance to both the enjoyment and ease of sewing. 

What am I talking about? It's the natural and unconscious way we perform every task of sewing - threading our sewing machines, stitching a seam, pinning, hand sewing, and an endless number of others tasks we do as sewists. Through many hours of practice our hands and fingers essentially learn how to work  -- that's rhythm.

Let's take the sewing machine for example. For new sewers learning to use this foreign piece of equipment can be intimidating, yet mastering the use of it is an important first step to truly performing the craft. Using a sewing machine comfortably requires a definite rhythm to kick in as there are many steps and processes to learn. For new sewers  it takes many attempts at threading their machines and sewing many rows of stitching before the rhythm of performing all those functions is there.

You can really see rhythm in play when they begin to stitch their first seam. Properly aligning the fabric cut edge to the seam allowance guide, remembering to hold the thread tails to ensure a clean start, press and holding the reverse button, and the one step so many new sewers can't quite remember to do - putting the presser foot down, are all part of a rhythmic sequence that all new sewers need to learn to sew a proper seam.  You can see the frustration when new sewers can't get it right. And, that boost of confidence when that rhythm finally kicks in. 
  
Pinning is another area. For experienced sewers our hands and fingers are trained to instinctively know how to hold and insert pins. I find it interesting to watch new sewers struggle to get this very simple task right. Just remembering how to orient the pins to get ready to sew a seam is all part of getting into the rhythm of sewing. 

I know all of this probably sounds silly, especially if you have been sewing for as long a time as I have - decades in fact. I certainly never gave it any thought until I witnessed when that unconscious rhythm doesn't yet exist.  For some it kicks in quickly and signifies sewing will be an easy craft to learn. Painfully, for others it will require a great deal of practice before it happens.  

Friday, February 22, 2013

The Theater Dress - Burda Project 11/2012


Finalmente - its finally done! 

You would think it was difficult to make.  Not so. Making Burda's "theater dress" was easy. Getting it to fit my daughter who lives in another state was the difficult part.

It all started around the time I received my November issue of the Burda magazine. I'm new to the Burda universe. Though I have been a visitor to Burdastyle.com for some time now, this was only my third issue of the pattern magazine. In general, I love the international flavor of the website and magazine. I am truly intrigued to see what people around the world are sewing and amazed at how many young people are into the craft in a serious way. Since my personal goals revolve around perfecting my garment sewing skills, I love the fact that that seems to be Burda's forte as well.  

Just a day or two before receiving my November issue, I happened to be perusing a women's clothing catalog where I saw a darling dress that I thought would look lovely on my daughter. A relatively simple dress with 3/4 sleeves, a fitted silhouette done in a teal-ish green ponte knit that would be perfect for the office or could be dressed up for an evening out.

When I began paging through the Burda magazine that arrived the following day there it was. The same dress I had just seen in the catalog. Well, not exactly the same, but the lines and silhouette of the dress were essentially the same. Right then and there I decided to make Burda's "theater dress" for my daughter.  A simple task I thought. Something she could wear for the holidays, possibly for our Christmas eve party.  Boy, was I wrong! What I thought would take a few weeks turned into several months to complete.

Burda Magazine 11/2012 - Theater Dress
While I love and will continue to be part of the Burda universe I do find fault with Burda's focus on women so much younger than me. While I am the first to appreciate youthful silhouettes and modern day styles, I no longer have a 'youthful silhouette'.  So, unfortunately, many of the patterns offered in the magazine simply don't suit me.  On the other hand, many relate quite well to my daughter, who fits both Burda's age profile and has a figure well suited to many of their stylish garments.

It was the first time using one of the patterns from the magazine. It was also the first time using their sizing specs. What an eyeopener that was!  And, I thought multi-sized patterns were a challenge! It was also the first time making my daughter a dress from a distance where I couldn't easily fit her. 

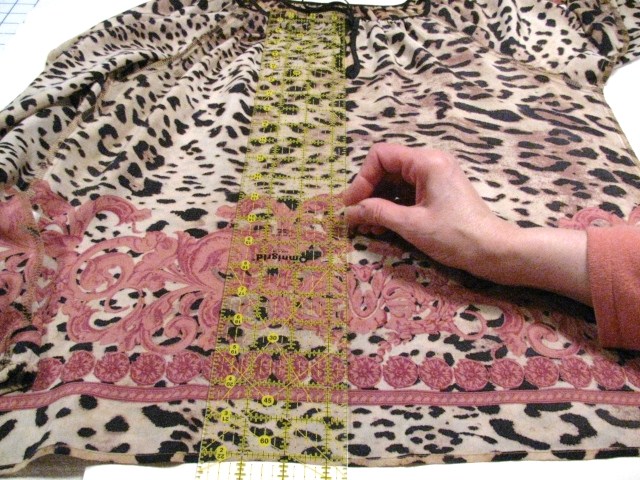
I changed the style of the Burda dress ever so slightly. The long sleeves became 3/4 length, and the dress length was shortened considerably to suit my daughter's taste. I also added a vent to the back of the skirt and fully lined it. My fabric of choice was a teal-ish green colored, medium weight ponte knit, similar to the catalog dress.
  
The design of the dress was pretty simple so making the actual dress was pretty straightforward. Getting it to fit my daughter was altogether another story. A rather fitted dress style, getting the fit just right was pretty important.  So, I started with a muslin altering the pattern specs to fit my daughter's bust, waist and hip measurements. 


Since she lived several states away, I waited until she was visiting home for the Thanksgiving weekend for her first muslin fitting. Despite having cut the pattern to her measurements, the fit wasn't even close! Everything was 1-2 sizes too big and the back didn't fit at all. Back to the drawing board. Almost all of the bodice details had to be adjusted - front and back darts, armholes, neckline, and don't get me started on fitting the back. With so many adjustments I now had to wait until she returned home for the Christmas holiday to see how the revised muslin would fit.

Christmas arrived and we commenced once again refitting the muslin. Still too big! So more adjustments and additional alterations to the pattern. In the hustle and bustle of the holidays getting my daugther to even sit for a fitting was itself a challenge. When I finally got her to try the dress on again it was literally the day before she was to return home. She tried on the dress, and the back was still not right. OMG!!  There was no time to finish it before she jumped on her plane home, so once again, more adjustments and waiting. 

Fortunately, I was able to pin the last of the alterations in place before she left so I could complete the dress in her absence.  All in all it turned out beautifully. Off went the dress in the mail to my daughter with a prayer this final version would finally fit her.  And, indeed it did! Hurray! Double Hurray!

In the meantime, I made a duct tape dressform of her in hopes future projects won't be so problematic. I have a blouse in the works which will test the dressform sizing.  We'll see.

As for more Burda pattern projects, I'm a bit leeryWhile I am fully aware of the fitting challenges garment sewing represents, its something I am determined to master. As such I have declared 2013 the year I master the art of fitting.  I'm just not sure it will be with a Burda magazine pattern. 


Monday, February 18, 2013

My Latest Handbag - A Drawsting Silhouette


Many years ago I was the handbag buyer for a major department store here in Detroit, called J.L.Hudson (its now Macy's). The job called for frequent buying trips to NYC, L.A., Italy and Asia in search of handbags and small leather goods for the chains 20+ stores. I bought fabulous bags for the chain representing a wide range of price points, from inexpensive bags to beautiful one retailing for hundreds of dollars. I loved that job as well as many of the bags I bought for the store. So much so, I maintained huge stashes of bags. In fact, I always kept several in my car so that I could match my bag to whatever outfit I was wearing before I entered my workplace as a way to both enjoy all the beautiful bags I owned and to promote them. 

Now I make them, in most cases, for less than $20 a bag. Granted, the ones I make aren't constructed from fine leathers or represent the style du jour. Nor, do they display the many designer nameplates I purchased for the store. Nonetheless, they are equally practical, functional and fun to make.

I continue to always take note of handbags people are carrying these days. And, I am always in search of a great handbag silhouette to replicate. Easier said than done, given many of today's overdone and sometimes ridiculous styles. At a recent family gathering, however, my sister was carrying a new bag she had purchased while on a vacation in Northern Michigan that managed to catch my attention. It was a darling drawstring style bag made of several pastel colors of leather, in a color-block fashion. The overall style was both clever and practical. Not too big, with straps that could fit comfortably over the shoulder and with plenty of pockets inside and outside to store cellphones, keys and other assorted personal items. 


This could definitely be made in fabric, I thought, and I had a stash of fabric that would suit the style. What I had consisted of some black nubby textured upholstery fabric along with a coordinating print and a great Japanese inspired cotton print for the lining. Great for making an all-season bag and sturdy enough to last a season or two. 

Since I didn't possess the bag I had to design it based on my memory of what it looked like and how it was constructed. 


I find upholstery fabric works quite well for handbags.  It provides good body, sound structure and durability to the bag. Nonetheless, I always add a good medium to heavy weight interfacing to them. The same is true for the lining. Adding a fusible interfacing makes the lining more durable, which is especially important for the pockets which take all the wear and tear. 


I'm pleased with the way the bag turned out. In fact, after the bag was made, I saw it again and was amazed at how closely I interpreted the bag's dimensions and style components. 


Monday, February 11, 2013

Samples Week


Project Runway Dress

As I often have to do these days, I spent the last few days making samples for the classes I teach at Joann's.  Since many of the classes featured last session will be repeated in March and April, I only had to sew 2 new samples - a simple apron and this dress.  
 

The class is designed to teach students how to sew with knits with or without a serger. Therefore, the dress is made in a fairly lightweight jersey knit. A knit just weighty enough so as not to curl at the edges which made it relatively easy to work with  -- a lesson I would like to pass on to the students.  I chose a solid color as opposed to a fun print to show off the many style details of the dress -- its front pleating, waist wrap treatment and pleated skirt. 

I don't have a serger so I employed the usual sewing techniques for sewing knits on a regular sewing machine. The jersey was hefty enough so I didn't need a walking foot to reduce pressure when stitching the seams. Simply loosening the tension a bit was sufficient. Selecting a small zigzag to stitch most seams provided enough stretch throughout the dress.  To finish the seams I used my lock cutter which has become my go-to tool when sewing with knits. For those unfamilar with this tool, it secures to the machine much like a walking foot does.  Its basic function is to finish a seam edge with a zigzag stitch while at the same time trimming the seam with its built-in cutter. 


Finished seam with Lock Cutter
 As is the case with most of the Joann classes, the pattern is from Simplicity #2145.  It's from their Project Runway collection which is component driven. You can mix and match sleeve and front and midriff treatment options to create the style you want to make. Sleeve options include a short sleeve, long sleeve and a three quarter sleeve. For the dress the neckline can feature a cowl treatment or pleated V-neck with either a wrap or drape midriff option. For the class I will be teaching, students will be making the dress with the short sleeves, the pleated neckline and the foldover wrap treatment. 


I made the dress in a size 8 which when finished looks more like a size 4 or 6 -- very small in the back and the pleated front rests very high. I used an invisible zipper in the back which gives the dress a very nice, clean finish. Overall, the dress turned out great.  It isn't a style I would ever wear, but for someone with a small, thin frame the dress is a winner.

Tuesday, February 5, 2013

I WON A BOOK!


To promote BurdaStyle's newly released book "Sewing Vintage Modern" the burdastyle.com website held a "Comment to Win" contest. Anyone could enter a comment on their blog site relating to the concept of the new book. Two entries won a copy of their new book and I was one of them.  Very exciting!

For those unfamiliar with the book it is essentially a collection of patterns. The patterns are designed to create modern interpretations of looks inspired from the 1920's to the 1980's. Examples include a lovely drop-waist flapper-inspired dress reminiscent of the 1920's, and sailor styled bell-bottom pants so very 1970's. 


I learned how to sew in the 60's so I am a bit partial to the looks of that era. Clothes Marlo Thomas wore on her TV comedy "That Girl" are what come to mind when I think of clothing from the 1960's. And, who can remember the Mondrian color block dresses,  or the beautiful clothes worn my Jackie Kennedy? Unfortunately, the patterns for that decade in the book are just so so. 

I'm not sure how many of the patterns I will make for myself, but there are several that would be lovely on my daughter. It's a very nice book and I am quite grateful to have won a copy.